File Fieldtype
File fields utilize the built-in file browser to store uploaded files and images for your publishers.
Note: Your site must have at least one upload directory before you can create a file field.
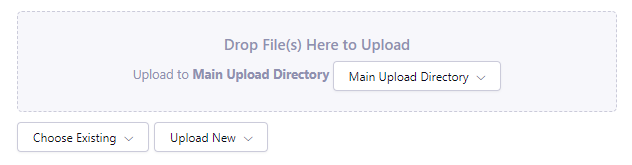
A File field allows you to browse through existing files and upload new files. You can use the operating system’s file selection interface or simply drag and drop files to the File field to upload them.
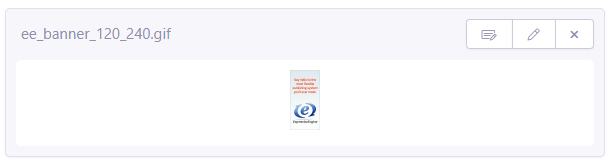
Once a file has been selected in the field, that file can be replaced by clicking the ![]() icon. The field selection can be cleared by clicking
icon. The field selection can be cleared by clicking ![]() icon (this will not remove the file from the system). You can also change the file metadata (such as the title or description) by clicking the
icon (this will not remove the file from the system). You can also change the file metadata (such as the title or description) by clicking the ![]() icon - please note that file’s metadata will be changed globally throughout the system.
icon - please note that file’s metadata will be changed globally throughout the system.
Field Settings
Allowed File Types
Gives the option to limit the file field to images only, or allow all safe file types.
Allowed Directory
Gives the option to limit the file field’s ability to browse and upload to certain directories. You can allow all directories, or only allow one directory to browse and upload to.
Show Existing Files?
When the form is rendered on the front-end using Channel Form, this setting allows you to specify whether or not you’d like to show existing files in the selected upload directory and allow the user to choose from those in addition to being able to upload a new file, or do not show existing files and only allow the user to upload a new file.
Existing Files Limit
Regarding the Show Existing Files? option above, allows you to limit the number of files that appear in the existing files drop down.
Template Tag Usage
Single Variable Usage
In its most basic form, a File field can be used as a single tag that simply outputs the URL of the file:
{news_image}
If you have defined any image manipulations you can modify the tag with the Short Name of the manipulation. For example, if you’ve defined a “small” manipulation, the following will output the URL to that version:
{news_image:small}
Conditional Content Check
If you want to see if there is a file selected, the easiest method is to check for the file URL:
{if news_image == ""}There is no news image selected.{/if}
or even
{if news_image}File URL: {news_image}{/if}
Wrap Parameter
You will frequently want to link to the file in your entry. Using the wrap parameter can simplify this process:
{news_image wrap="link"}
Will render as:
<a href="https://example.com/dir/filename.ext">filename</a>
It can also be used to create image tags. In this case the filename will be used to create the alt parameter.
{news_image wrap="image"}
Which will output as:
<img src="https://example.com/dir/filename.ext" alt="filename" />
Variable Pair Usage
You can show detailed information about the file by using it as a tag pair and then referencing any of the available variables:
{news_image}
  This file is a {extension} and was uploaded on {upload_date format="%Y %m %d"}
  <a href="{url}">View it now</a>
{/news_image}
Template Tags
{credit}
The credit assigned to the file.
{description}
The description assigned to the file.
{directory_id}
The ID number of the file upload directory
{directory_title}
This variable simply displays the content from the “Descriptive name of upload directory” setting for the directory that the file is in.
{extension}
The file’s extension, if it has one.
{file:XX:url}
This is not actually a template tag. It appears in the contents of an entry’s field to reference a file. See Textarea Fieldtype.
{file_id}
The unique id of the file.
{file_name}
The full name of the file (including its extension).
{file_size}
The size of the file (in bytes). To display the size in a human friendly manner, (e.g. 147KB) use:
{file_size:human}
This includes the appropriate <abbr> HTML tag. Or, if you prefer to have the units spelled out, (e.g. 147 kilobytes), use:
{file_size:human_long}
If you have defined any image manipulations you can modify this tag with the Short Name of the manipulation. For example, if you’ve defined a “small” manipulation, the following will output the file size of that version:
{file_size:small}
{file_size:small:human}
{file_size:small:human_long}
{folder_id}
The ID of the folder the file is in. If the file is in the top level folder of the upload directory, it will return 0.
{height}
The height of the image (in pixels) if applicable.
If you have defined any image manipulations you can modify this tag with the Short Name of the manipulation. For example, if you’ve defined a “small” manipulation, the following will output the height of that version:
{height:small}
{id_path}
{id_path='gallery/full_image'}
The URL to the specified template. The ID number of the entry will be automatically added. For example, this:
<a href="{id_path='gallery/full_image'}">my picture</a>
Would be rendered like this:
<a href="https://example.com/gallery/full_image/234/">my picture</a>
{location}
The location assigned to the file.
{mime_type}
The automatically-detected MIME type of the file.
{modified_date}
{modified_date format="%Y %m %d"}
The date the file was last modified. See Date Variable Formatting for more information.
One powerful use of the modified_date is ‘cache busting’, forcing browers to use a new image rather than a cached one when an image is modified but not renamed:
{image}
    <img src="{url}?v={modified_date}" />
{/image}
{path}
The URL to the folder containing the file, including a trailing slash.
{title}
The title assigned to the file.
{upload_date}
{upload_date format="%Y %m %d"}
The date the file was first uploaded. See Date Variable Formatting for more information.
{url}
The full URL to the file.
If you have defined any image manipulations you can modify this tag with the Short Name of the manipulation. For example, if you’ve defined a “small” manipulation, the following will output the URL to that version:
{url:small}
{url:thumbs}
The URL to the thumbnail image that’s auto created for the control panel.
{width}
The width of the image (in pixels) if applicable.
If you have defined any image manipulations you can modify this tag with the Short Name of the manipulation. For example, if you’ve defined a “small” manipulation, the following will output the width of that version:
{width:small}
On-the-fly image manipulations
In addition to pre-defined image manipulations it is possible to perform certain image manipulations on-the-fly in templates by using special template tag parameters.
Warning: Certain image manipulations can be processing-intensive and even cause timeouts. Use with caution.
The manipulations can be used as single modifiers as well as modifier tag pair.
:resize
{news_image:resize width="100" height="100"}
Resize the image.
| Parameter | Values | Default | Description |
|---|---|---|---|
| width | Number |
*required |
Width to resize to, px |
| height | Number |
*required |
Height to resize to, px |
| quality | 0-100 |
75 |
Image quality, % |
| maintain_ratio | y / n |
y |
Keep image ratio (yes/no) |
| master_dim | auto/width/height |
auto |
Master dimension when keeping image ratio |
:crop
{news_image:crop width="100" height="100" position="center"}
Crop the image. By default, cropping uses top left corner of image as starting position. You can specify x and y offset, if needed, or position="center" parameter to make crop happen close to image center.
| Parameter | Values | Default | Description |
|---|---|---|---|
| width | Number |
*required |
Width to crop to |
| height | Number |
*required |
Height to crop to |
| quality | 0-100 |
75 |
Image quality, % |
| maintain_ratio | y / n |
y |
Keep image ratio (yes/no) |
| position | center |
Crop close to image center | |
| x | Number |
0 |
Horizontal offset, px |
| y | Number |
0 |
Vertical offset, px |
:rotate
{news_image:rotate angle="hor"}
Rotate the image.
| Parameter | Values | Default | Description |
|---|---|---|---|
| angle | 90, 180, 270, vrt, hor |
required |
Rotation angle |
:webp
{news_image:webp}
Convert the image to WEBP format. Additionally all the :resize manipulations can be applied
| Parameter | Values | Default | Description |
|---|---|---|---|
| width | Number |
Width to crop to, px | |
| height | Number |
Height to crop to, px | |
| quality | 0-100 |
75 |
Image quality, % |
| maintain_ratio | y / n |
y |
Keep image ratio (yes/no) |
| master_dim | auto/width/height |
auto |
Master dimension when only width of height is specified |
:avif
{news_image:avif}
Convert the image to AVIF format. Additionally all the :resize manipulations can be applied
| Parameter | Values | Default | Description |
|---|---|---|---|
| width | Number |
Width to crop to, px | |
| height | Number |
Height to crop to, px | |
| quality | 0-100 |
75 |
Image quality, % |
| maintain_ratio | y / n |
y |
Keep image ratio (yes/no) |
| master_dim | auto/width/height |
auto |
Master dimension when only width of height is specified |
:resize_crop
{news_image:resize_crop resize:width="300" crop:width="100"}
Resize the image and then crop it.
| Parameter | Values | Default | Description |
|---|---|---|---|
| resize:width | Number |
*required |
Width to resize to, px |
| resize:height | Number |
*required |
Height to resize to, px |
| resize:quality | 0-100 |
75 |
Resized image quality, % |
| resize:maintain_ratio | y / n |
y |
Keep image ratio when resizing (yes/no) |
| resize:master_dim | auto/width/height |
auto |
Resizing master dimension |
| crop:width | Number |
*required |
Width to crop to |
| crop:height | Number |
*required |
Height to crop to |
| crop:quality | 0-100 |
75 |
Cropped image quality, % |
| crop:maintain_ratio | y / n |
y |
Keep image ratio when cropping (yes/no) |
| crop:x | Number |
0 |
Horizontal crop offset, px |
| crop:y | Number |
0 |
Vertical crop offset, px |
Using as modifier tags pairs
{news_image:resize width="100" height="100"}
    <img src="{url}" width="{width}" height="{height}" />
{/news_image:resize}
Tag Pair Variables:
{url}- processed image URL{width}- processed image width{height}- processed image height