File Manager
Control Panel Location: Files
If you are looking for information on using files in your entries and templates, reference the File module and File fieldtype documentation.
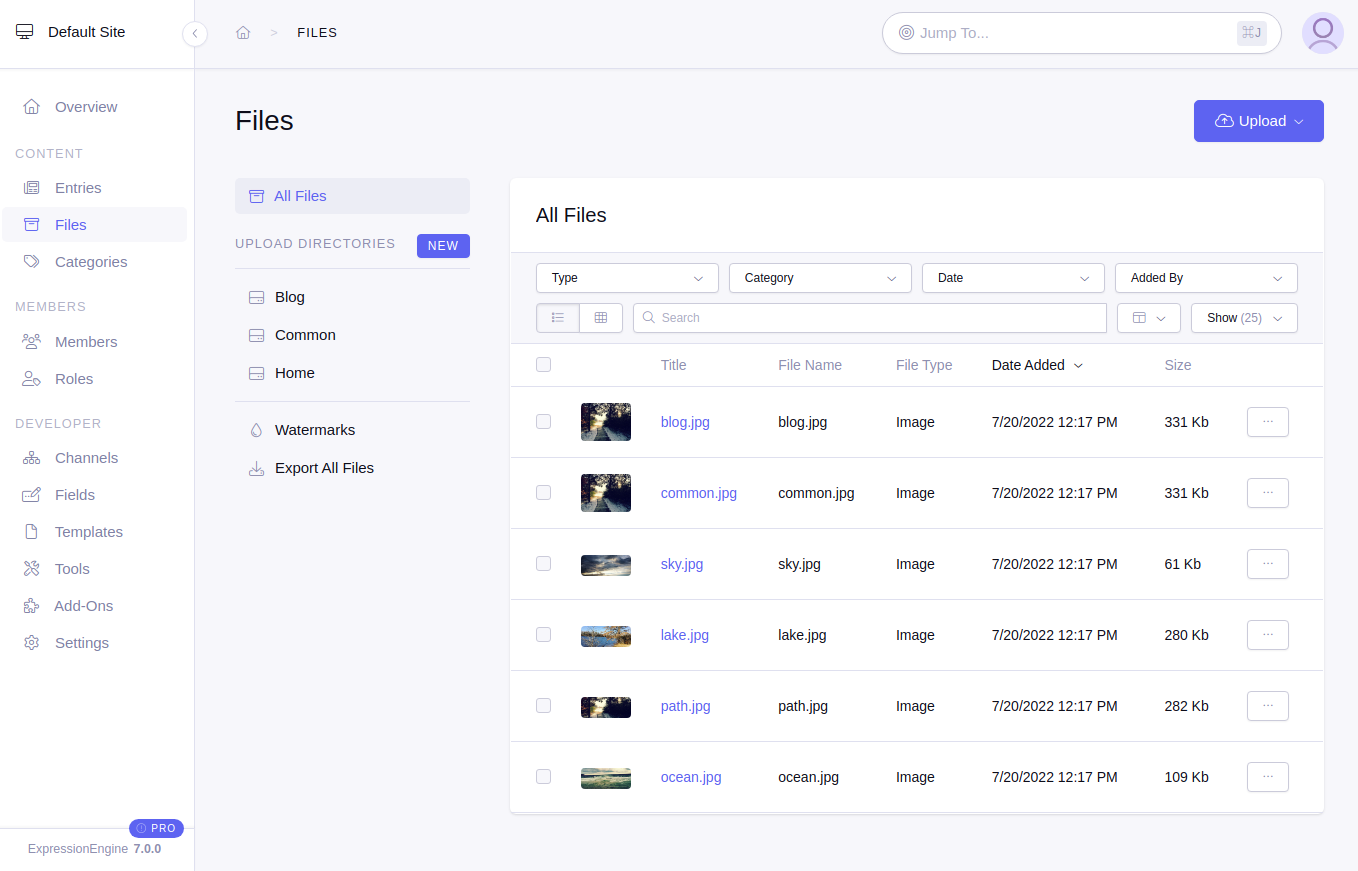
The File Manager allows you to view all of your previously uploaded files. Files can be filtered and searched by a number of criteria. The data included in the displayed list can be customized. The files can also be manipulated separately or in bulk.
Navigating File Manager
The File Manager is composed of several sections to help easily manage your files in ExpressionEngine.
Sidebar
The sidebar gives you access to creating, viewing, and managing Upload Directories; Watermarks; and Exporting All Files.
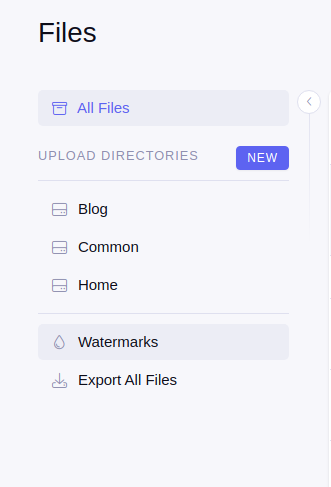
The sidebar can also be collapsed using the arrow icon ( ![]() ) that is displayed to the side of the sidebar when hovering over the sidebar.
) that is displayed to the side of the sidebar when hovering over the sidebar.
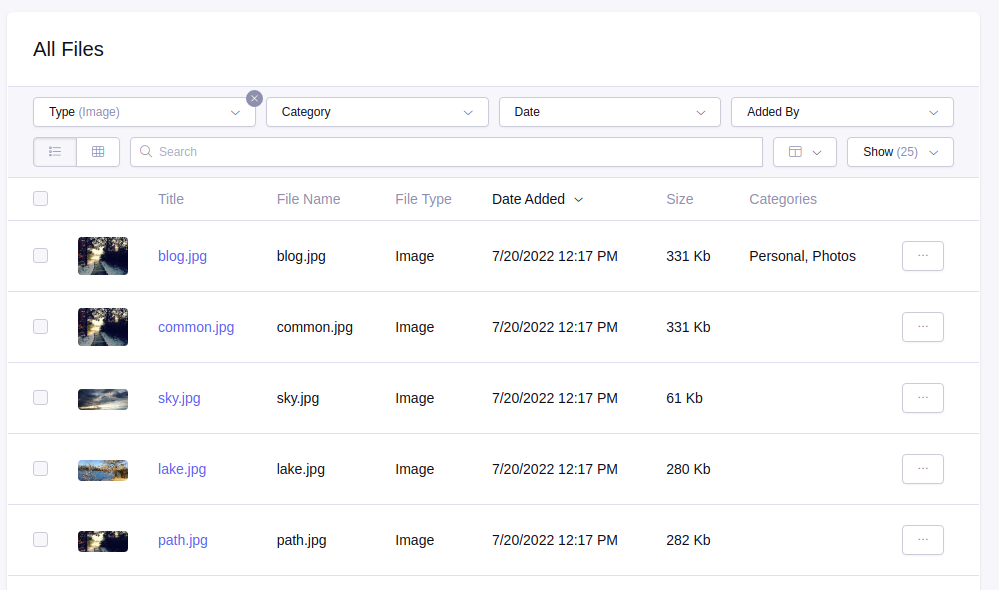
Filters
Filters allow you to quickly filter the files listed to find exactly what you need.
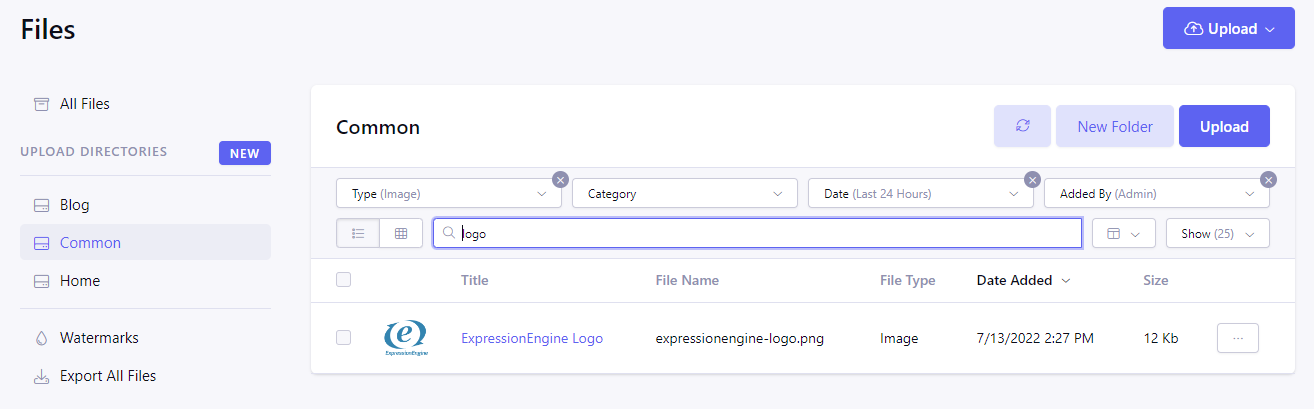
The following selectable filters are available:
- Type - Filter by the file type. Available types are Image, Document, Archive, Audio, Video (only file types of currently uploaded files are displayed)
- Category - Filter by categories available to files.
- Date Added - Filter by date added. Available options are Custom Date (enter in a specific date), Last 24 Hours, Last 7 Days, Last 30 Days, Last 180 Days, Last 365 Days
- Added By - Filter by the member who uploaded files
Clear selectable filters by clicking on the x in the top right corner of the filter.
Files can also be filtered using the keyword search option.
File Listing
The bulk of the File Manager screen is composed of the file list.

The File Listing is where your files are displayed based on your current view options. When using the All Files link, all files uploaded to your site will be displayed. When selecting a single Upload Directory from the sidebar, only files uploaded to that Upload Directory will be displayed.
View Options
The File Manager offers multiple view options, and allows you to adjust the files and the related data to be displayed in the file list.
View options can be set per Upload Directory as well as on the All Files view, and are automatically saved for each user and persists as you use the filters or pagination.
List View
The List View also exposes a Utility Action menu which quickly allows for action to be taken on an individual file without having to leave the file listing page. For more on these options see the available file actions below which are available in the Utility Action menu and as bulk actions.
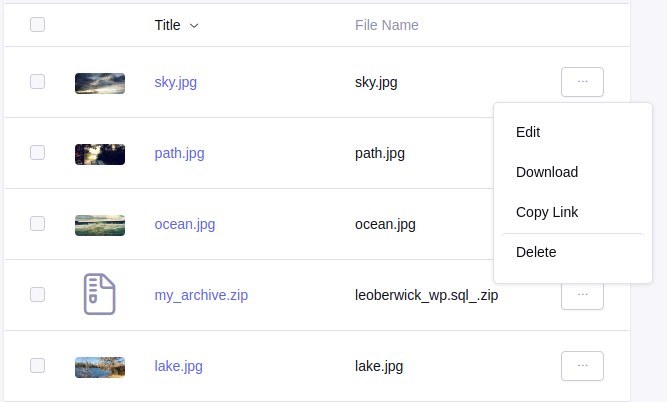
The columns displayed in the List View can also be adjusted to display file information relevant to your needs. These columns include:
- Title
- File Name
- ID#
- File Type
- Size
- Description
- Credit
- Location
- Categories
- Date Added
- Uploaded By
- Date Modified
- Modified By
- Dimensions
- Usage
Grid View
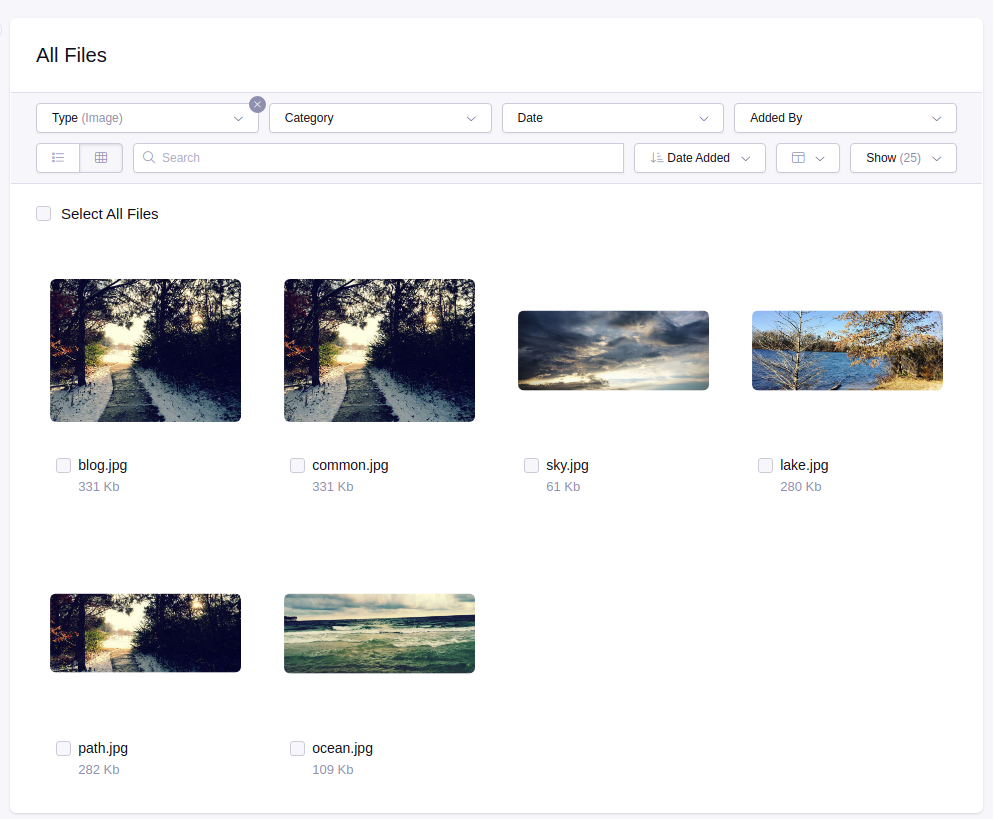
The Grid View gives you the ability to easily see thumbnails of images or icons of each file uploaded.
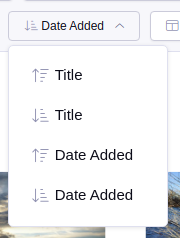
Sorting
Available from the Sort By dropdown, both the List View and the Grid View can be sorted by Title and Date Added ordered by ascending and descending. The default view is sorted by Date Added, descending.
Display Limit
The Display Limit dropdown allows you to limit the number of files displayed on a single page in the File Listing. Files can be displayed using a custom limit or by using one of the available options.
Uploading Files
There are 3 way to upload a file using the File Manager:
Drag & drop the files directly to the files listing area. If you are on the “All files” page, you will be asked to select an Upload Directory first otherwise, the upload starts instantly
Using the “Upload” button at the top right. You will be presented with a dropdown containing a list of available Upload Directories and folders. After selecting an Upload Directory you will be shown the OS file selector, and upon selection, your upload will start.
When viewing a specific Upload Directory, you can also use the “Upload” button right above the filters, which will upload into the current folder.
You can select and upload multiple files using each of these methods.
Do not navigate away or close the browser tab while the files are being uploaded.
File actions
The following are available as individual actions on each file in the table view. In thumb view, only bulk actions are available.
These actions can be accessed by clicking the ... on the right side of the table for each file.
The available actions are: [TOC=3]
Edit
Redirects to File edit page
Download
Downloads the original file.
Copy Link
Copies the web link to the file.
Move
Opens a dialog that enables you to move the file to a different Upload Directory or into another folder in the same Upload Directory. If a file you are moving is in use, it will display a notification, as well as a link to view where a given file is in use, and require the confirmation toggle to be switched on to move.
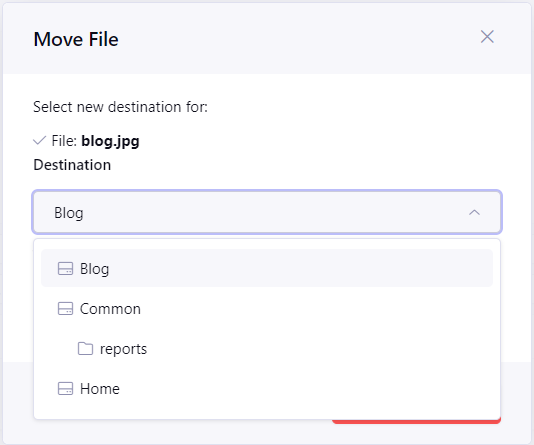
This option is only available when viewing a specific Upload Directory.
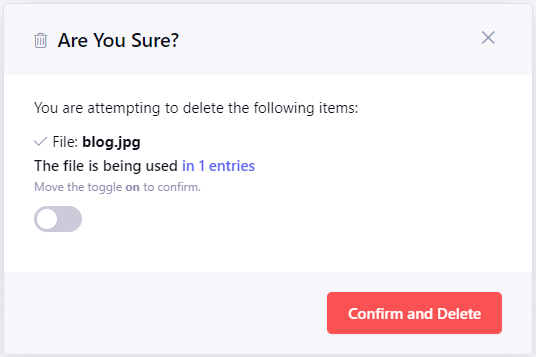
Delete
Opens the dialog that confirms file deletion. If the file is currently in use, it will be noted, and you will be required to switch the confirmation toggle to on.
Bulk actions
When checkboxes for one or several files are selected, the Bulk Actions dropdown becomes available at the bottom of the page. Bulk actions are not available for folders.
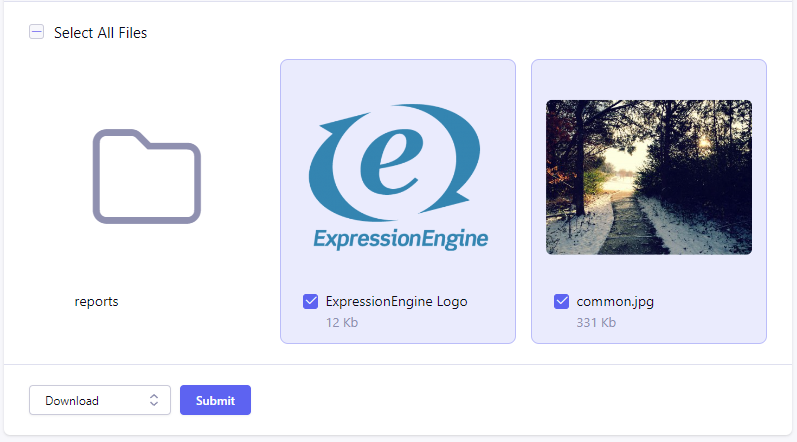
The list of bulk actions is the same that for individual file actions, but some items behave differently. The Edit and Copy Link options are only available if a single file is selected. The Download option will download the zip archive of files, even if only one file is selected.
Exporting Files
The files can be exported and downloaded as zip archive in two ways.
One is by using Bulk Actions and allows you to export the specific files needed.
Another is by using “Export all files” link in the sidebar. This link will export and download all files from all upload directories.
Note that exporting can be time and resource consuming.
Compatibility Mode
Note: Compatibility Mode is enabled by default for sites upgraded from older ExpressionEngine versions.
Tip: How to Turn off File Manager Compatibility Mode
ExpressionEngine 7+ stores files in the database differently then previous versions, and references them using a {file:XX:url} format instead of {filedir_X}filename.ext). This change enables ExpressionEngine to provide a more powerful overall experience with files: you can store files in subfolders, you can move files to different locations without breaking references in content, and EE can track if and where each file is in use.
However, third-party add-ons that parse file data on their own may not be compatible with the {file:XX:url} syntax, causing issues. In order to prevent a bad user experience, users can enable Compatibility Mode for the sites that are upgraded from earlier versions, though for a modern site, it is recommended to leave compatibility mode off.
If you know all installed add-ons are compatible with the new file format, you can run the Update File Usage (found in Tools-> Utilities-> Update File Usage), which will also convert all old file references to the new format. Then disable Compatibility Mode from the Content & Design settings.
Regardless of mode status, ExpressionEngine will still parse the {filedir_X} tags in channel entry fields.