Retired Documentation
You are using the documentation for version 2.11.9. Go here for the latest version or check here for your available upgrades to the latest version.
Wiki Special Categories Template
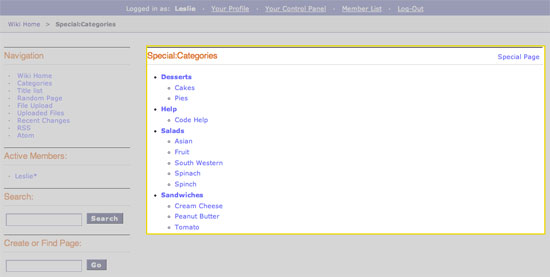
The Special Categories template creates a list of all the categories in a site as outlined below:

In addition to the variables in the Wiki Page template, the Special Categories template makes use of the the following Tags:
{wiki:categories}
This tag is used to display all the wiki’s categories. When put into the Wiki Article template, it will only show the categories for that specific article. It has Parameters and Variables available to it.
{wiki:categories} | Parameters
backspace=”“
{wiki:categories backspace="#"}
This removes “#” number of characters from the output at the end of the loop. This is useful for removing commas and <br />’s.
show_empty=”“
{wiki:categories show_empty="no"
This parameter lets you tell the wiki whether or not to display categories with no articles assigned to it. The possible values are:
- no: Categories with no articles will not be displayed.
style=”“
{wiki:categories style=""}
This will automatically nest the categories for you as standard xhtml using <ul> or render a list without any formatting. The values are:
- nested: renders the categories in a xhtml list with <ul>.
- linear: renders the categories with no formatting.
For more information on nesting please see the Style parameter in the Channel section of the User Guide.
{wiki:categories} | Variables
{wiki:categories} | Single Variables
category_name
Displays the category name.
switch=
{switch="option_one|option_two|option_three"}
This variable permits you to rotate through any number of values as the categories are displayed. The first category will use “option_one”, the second will use “option_two”, the third “option_three”, the fourth “option_one”, and so on.
Multiple instances of the {switch=} tag may be used and the system will intelligently keep track of each one.
{wiki:categories} | Conditional Variables
{wiki:category_subcategories}
This tag is used to display the subcategories of a single category. It has Parameters and Variables available to it.
{wiki:category_subcategories} | Parameters
backspace
{wiki:category_subcategories backspace="#"}
This removes “#” number of characters from the output at the end of the loop. This is useful for removing commas and <br />’s.
style
{wiki:category_subcategories style=""}
This will automatically nest the subcategories for you as standard xhtml using <ul> or render a list without any formatting. The values are:
- nested: renders the categories in a xhtml list with <ul>.
- linear: renders the categories with no formatting.
For more information on nesting please see the Style parameter in the Channel section of the User Guide.
{wiki:category_subcategories} | Variables
Pair Variables
header
{header} content before listing subcategories. {/header}
This variable will display content before the subcategories are listed.
Conditional Variables
if subcategory_total
{if subcategory_total == '0'}
Test the number of subcategories. This is typically used display alternate content if no subcategories exist.
{wiki:category_articles}
This tag displays a list of articles within a category. It has Parameters and Variables available to it.
{wiki:category_articles} | Parameters
backspace=”“
{wiki:category_articles backspace="#"}
This removes “#” number of characters from the output at the end of the loop. This is useful for removing commas and <br />’s.
limit
{wiki:category_articles limit=""}
This determines how many articles are displayed on a category’s page. For example, this:
{wiki:category_articles limit="20"}
Would limit the number of articles displayed to 20.
paginate
{wiki:category_articles paginate=""}
The Wiki module uses the same pagination syntax as all first-party modules. Please look at the Pagination documentation for more information.
{wiki:category_articles} | Variables
Pair Variables Conditional Variables Single Variables
Pair Variables
header
{header} content before listing articles. {/header}
This variable will display content before the articles are listed.
footer
{footer} content after listing articles. {/footer}
This variable will display content after the articles are listed.
letter_header
{letter_header}<div class="cap">{letter}</div>{/letter_header}
This is used to organize articles by the first letter of the title. It looks at the first character of each article and when there is a new character it will create a header for that letter using the {letter} variable as in the example above.
