Retired Documentation: You are using the documentation for version 1.7.3 which was retired in 2013. Go here for the latest version documentation or check here for your available upgrades to the latest version.
Quick Start Tutorial - Step 5Creating a Weblog
The Goal: Learn how to create a new "Weblog," assign Weblog Full and Short names, and assign Groups to a Weblog.
Creating a New Weblog
To create a new Weblog, click on the Admin tab in the control panel.

Clicking the Admin tab brings you to the Admin section of the Control Panel shown in the screen shot below.
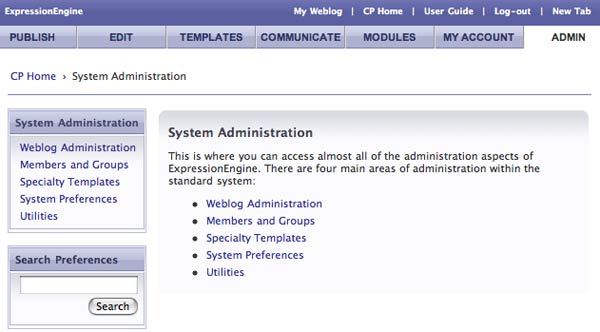
To create a new Weblog, click on "Weblog Administration," as highlighted below.
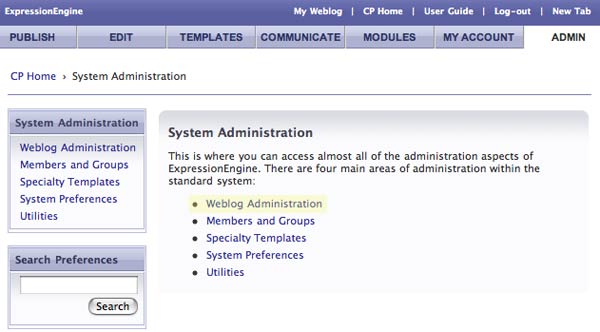
Clicking on Weblog Administration displays all Weblog Administration options. Next, click on "Weblog Management," as highlighted below.
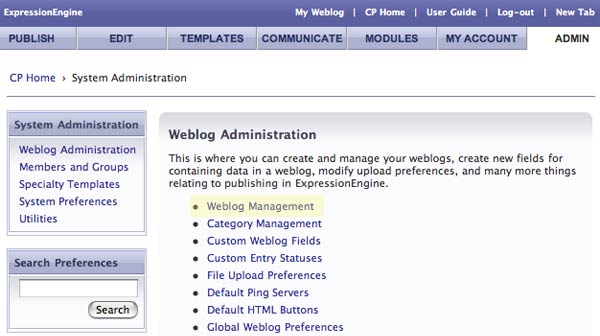
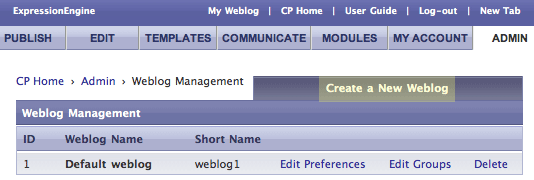
This brings you to the Weblog Management screen, as shown below. The Weblog Management screen lists all Weblogs and lets you set the Preferences and Groups (category, status, and fields) for each Weblog. The Edit Weblog Preferences section of the User Guides describes each preference in detail.
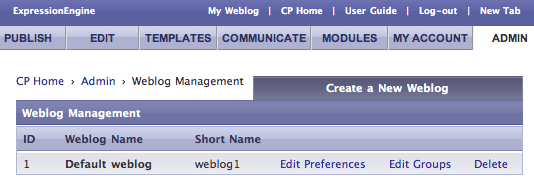
Create a new Weblog by clicking "Create New Weblog" in the upper right of the screen, as highlighted below.
This brings you to the New Weblog screen as shown below.
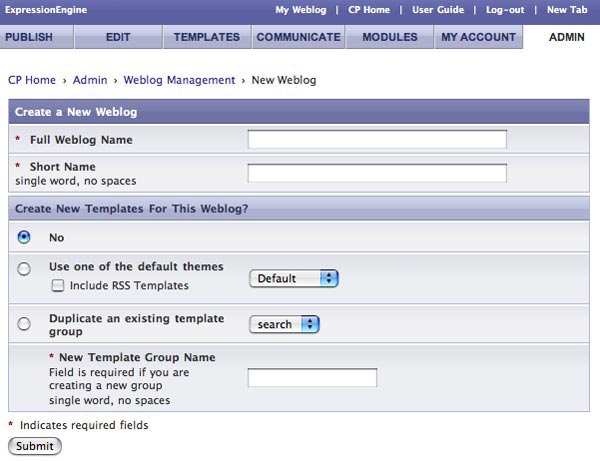
This tutorial only focuses on the Full Weblog Name and Short Name fields. The Full Weblog Name is the descriptive name for the Weblog and what visitors to your site will see. The Short Name is how you will reference the Weblog in your Templates.
Important concept: The Short Name is how you will reference a Weblog in your Templates.
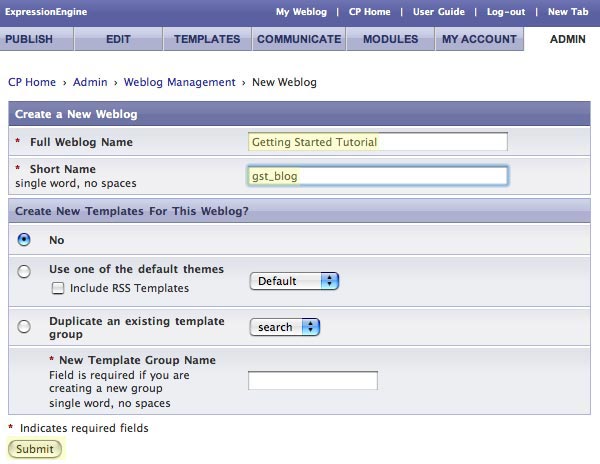
For the Full Weblog Name, type "Getting Started Tutorial" and for the Short Name type "gst_blog," as shown in the screen shot below. The Short Name can be anything you want. For this tutorial we used "gst_blog" because that's short for "Getting Started Tutorial weblog." Keep in mind that a Weblog can be used in any Template and there is no assumed association between any Template and any Weblog. Therefore your Short Name doesn't have to match the name of a Template.
Leave all the other options at their default settings and click Submit to create the new Weblog.
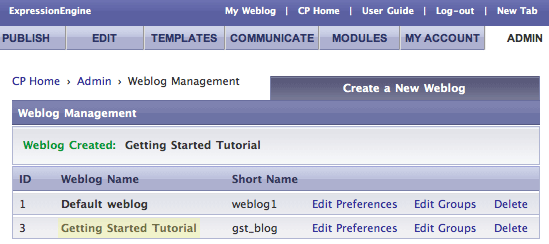
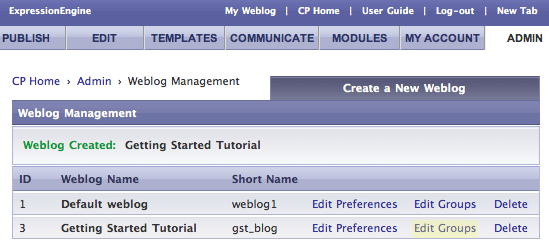
This returns you to the Weblog Management screen and your new "Getting Started Tutorial" is listed in the Weblog list as shown below.
The last step in Weblog creation is to assign Groups to the new Weblog. Groups are how a Weblog is assigned Categories, Status Fields (like Open, Draft, Closed), and Fields (Summary, Body, Extended, etc).
This tutorial will just assign the default groups to the Getting Started Tutorial weblog. But you'll want to experiment with custom Categories, Statuses, and Fields later. The ability to customize Groups on a per Weblog basis is one of EE's most powerful features. See Category Group, Status Group, and Field Group sections of the User Guide for more information.
To assign Groups to a Weblog, click "Edit Groups," as shown below.
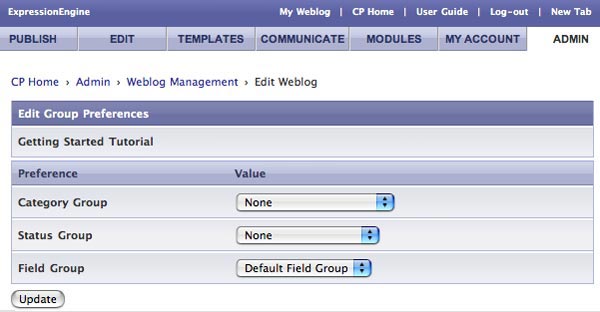
This brings you to the Edit Groups Preferences screen. The Category and Status Groups are set to "none" and the Field Group is set to "Default Field Group," as shown below.
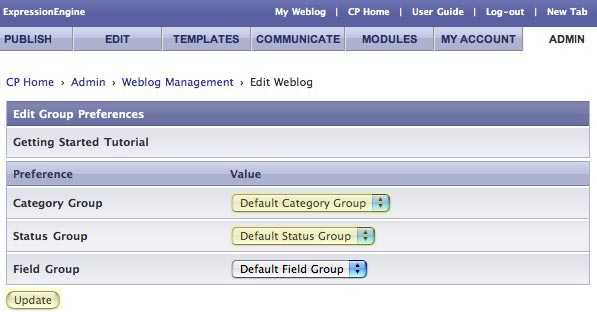
Using the drop down menus, change the Category and Status Groups to the Default Category and Default Status Groups as shown below. Then click Update.
You're done setting up your new Weblog! Now let's get some content into it.